Fall

Ginger Molasses Cookies

photo1 2.jpg

Happy day 2 of my Christmas Cookie Countdown! Today I'm featuring my ultimate favorite cookies, Ginger Molasses Cookies!

These cookies are irresistibly delicious, and every time I make them, they are gone in a snap!

Even my mother, who is not a fan of cookies, is obsessed with these!

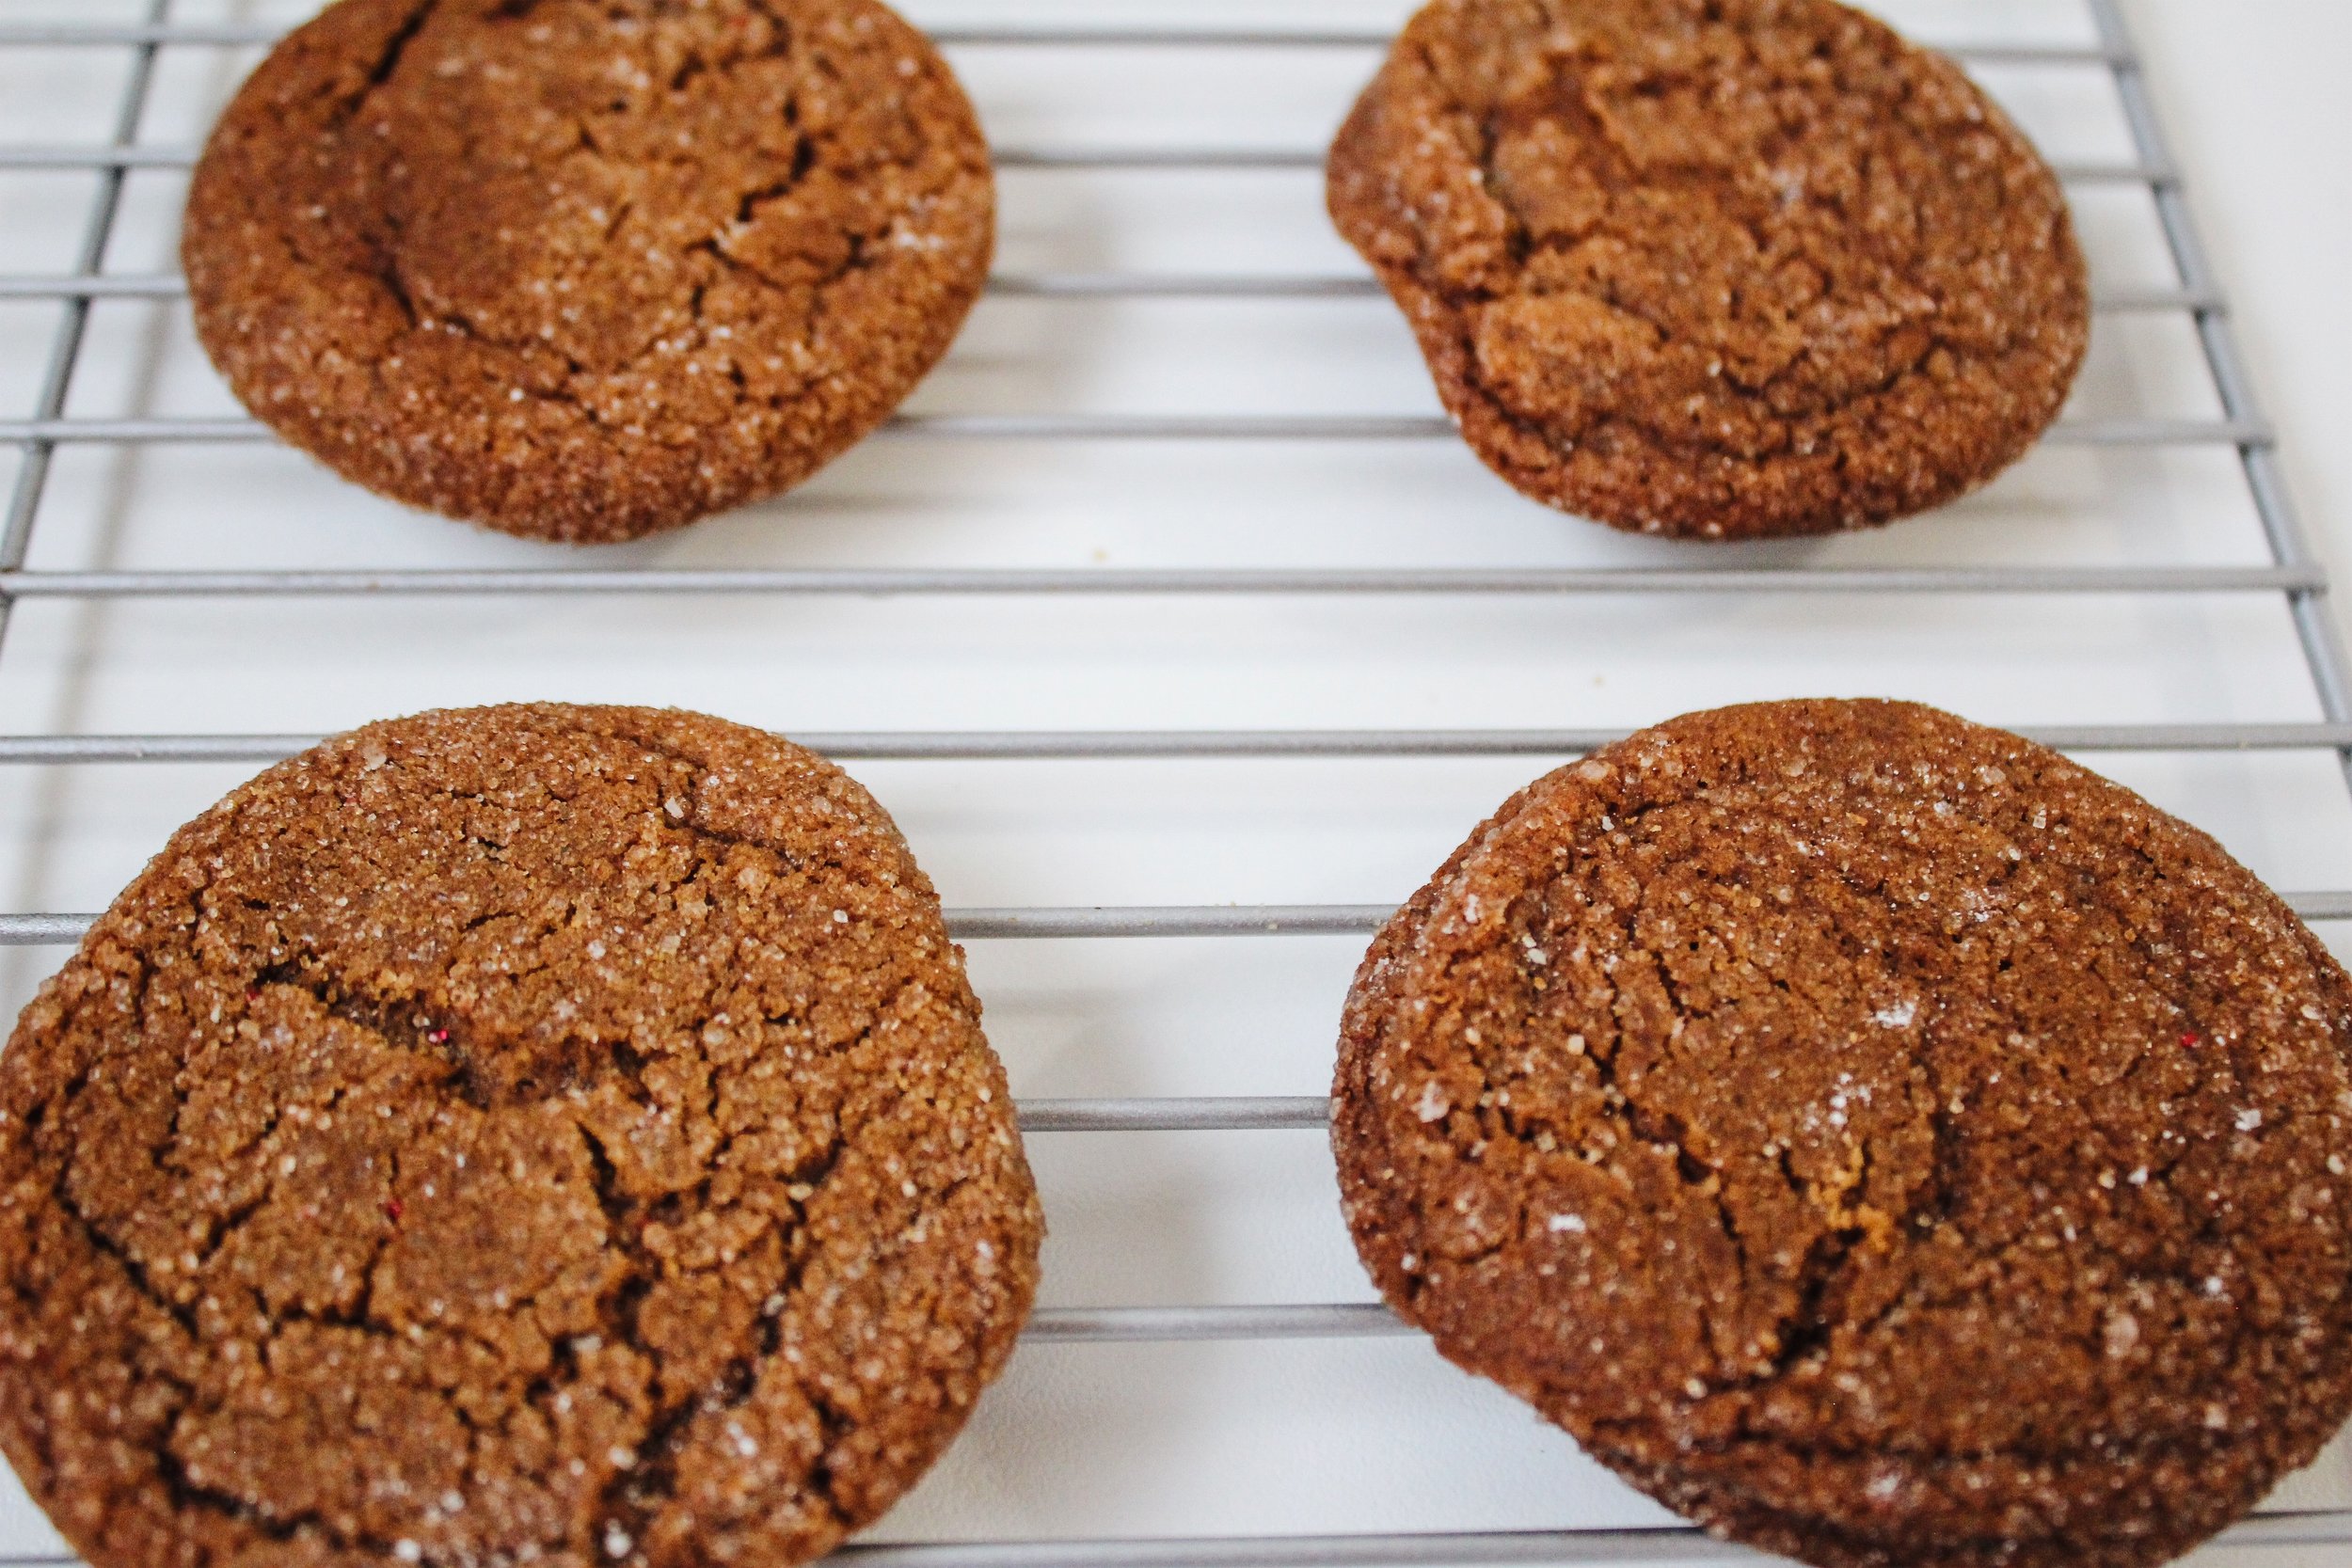
They are packed with warm flavors and spices. The dough is chilled, rolled in coarse sugar which creates a beautiful crystalized crust and crunch on the outside while still being soft and chewy in the center.

I give these cookies a bang halfway through baking, shout-out to Sarah Kieffer owner of the The Vanilla Bean Blog, who basically made pan- banging popular!

I do it to all my cookies! It creates a crinkle effect.. literally, once you try it, you'll understand my obsession!

This cookie dough freezes well, so they are great to make ahead for Christmas or any other time of the year!

MyPortugueseMother - Ginger Molasses Cookies
GingerMolassesCookies.MPM2
MyPortugueseMother - Ginger Molasses Cookies

Ingredients 

  • 2 cups all purpose flour

  • 1/2 tsp. salt

  • 2 tsp. cinnamon

  • 1 tsp. ground cloves

  • 1 tsp. ground ginger

  • 1 tsp. baking soda

  • 1 1/2 sticks unsalted butter, at room temperature

  • 1 cup packed dark brown sugar

  • 1 egg

  • 1/4 cup molasses

  • Coarse sugar, such as Turbinado, or Muscovado

Recipe

  1. In the bowl of a stand mixer, beat together the butter and sugar until light and creamy, about 3 to 5 minutes.  Add the egg and molasses and continue beating until well combined.

  2. In a separate bowl whisk together the flour, salt, cinnamon, cloves, ginger, and baking soda. Add the flour mixture into the  butter mixture and beat until just combined.

  3. Let the dough chill in the refrigerator until firm, at least 2 hours.

  4. Preheat oven to 350°F.

  5. Line two sheet trays with parchment paper. Using a cookie scoop, scoop the dough and form into a ball.  Roll in coarse sugar. Place on prepared sheet trays.

  6. Bake for 10 to 12  minutes. Bang the pan half-way through the baking time, or when the cookies have puffed up. (creates a crinkle effect).

  7. Let cool before serving.

Thanksgiving Guide

Happy Thanksgiving !


Thanksgiving is only a few days away, and if you're still trying to figure out what to make for Thanksgiving or a Friendsgiving, look no further! 

I've come up with a list of all delicious sides that will pair perfectly with your turkey! 

I have been thinking about my own Thanksgiving table, and form as far as I can remember, we have had the same menu, no dishes were ever added or taken away, and that's because everything on that table goes perfectly with each other - the perfect harmony between savory and sweet.

So here are a few of my favorite savory and sweet recipes that i think are perfect to celebrate and share with family and friends 

photo13.jpg

My Portuguese Mother // mac & cheese
photo5.jpg
photo8.jpg
photo2.jpg
baked+pie+pear.jpg
3FEAD7D5-E622-43FD-958E-E401B560D30E.JPG
My Portuguese Mother //
Cranberry+Tart2.jpg

Macaroni & Cheese

What is more comforting than a bowl of warm mac & cheese! NOTHING.

This recipe is perfect for a weeknight meal because of how simple it is to make, and also, it can easily be doubled for any holiday like Thanksgiving or just a family dinner.

Before jumping straight to the recipe, let's breakdown the important qualities to the perfect mac & cheese.

  1. Pasta - Look for a pasta with a lot of nooks and crannies. I love to use cavatappi, but other popular shapes are elbow pasta, shells, or pipette.

  2. At least 2 Cheeses - When it comes to choosing your cheese, remember to use at least 2 in your recipe, 1 sharp, and 1 creamy. Using at least two will give your mac and cheese creaminess while the other will give a flavor punch. My favorite cheeses to use are Gruyere and Cheddar! But any mix of sharp and creamy cheese will do like these:

    • Sharp Cheese - Parmesan, Pecorino, aged Asiago,

    • Creamy Cheese - Gouda, Monterey Jack, and Fontina, cream cheese

  3. Grate your cheese! - Picking up pre-shredded bag and cheese is tempting; however, I urge you to think twice! The pre-shredded cheese bags have stabilizers and anti-caking agents, lessen the flavor of the cheese, and it won't melt properly. BUT, if you are tight on time, I advise you to pick only one pre-shredded cheese!

  4. Spices - this recipe has mustard powder and a pinch of cayenne pepper. Adding a pinch of spice really makes all the difference! The mustard goes really well with the cheese, and the pepper just adds that extra kick.

photo1 2.jpg
photo2 2.jpg
photo12.jpg
photo11.jpg
photo3 2.jpg

Ingredients

  • 4 tablespoons unsalted butter, plus more for baking dish

  • ¾ cup panko (Japanese breadcrumbs)

  • ¼ cup Parmesan, finely grated 

  • 2 teaspoons fresh sage leaves

  • 1 teaspoon kosher salt, divided, plus more

  • 8 oz. cavatappi 

  • 2 ½ cups whole milk

  • 2 shallot, grated

  • 1 garlic clove, finely grated

  • 2 tablespoons all-purpose flour

  • 4 oz. Gruyère, grated 

  • 8 oz. mild white cheddar, grated 

  • ½ teaspoon English mustard powder

  • Pinch of cayenne pepper

Recipe

  1. Preheat oven to 350°. Butter a 2 qt. Baking dish. 

  2. Melt 2 Tbsp. butter in a medium skillet over medium heat. Add panko and cook, stirring, until crumbs are golden brown, 6–8 minutes. Transfer to a small bowl and toss with Parmesan, thyme leaves, and ¼ tsp. salt.

  3. Cook pasta in a large pot of boiling salted water, stirring occasionally, until al dente (the noodles will continue to cook in the cheese sauce, so take them out a minute or two before you think they’re actually done). Drain pasta; let cool while you make the sauce.

  4. Bring milk to a bare simmer in a small saucepan; keep warm. Melt remaining 2 Tbsp. butter in a medium saucepan over medium-high. Add onion and garlic and cook, stirring, until onions are fragrant and beginning to soften, about 2 minutes. Sprinkle flour over and cook, stirring constantly, until mixture starts to stick to bottom of saucepan, about 1 minute. Add warm milk in a few additions, whisking to combine after each addition.

  5. Bring béchamel sauce to a boil, then reduce heat and simmer, stirring, until sauce is thickened and doesn’t feel grainy when a little bit is rubbed between your fingers, 6–8 minutes.  Add the grated cheese, mustard powder, cayenne, and ¾ tsp. salt and stir until cheeses are melted and sauce is smooth. Remove from heat and mix in pasta; transfer to the buttered baking dish.

  6. Bake 10 minutes. Top with Parmesan breadcrumbs and bake until sauce is bubbling around the edges, 8–10 minutes longer. Let cool in pan 15 minutes before serving.


Adapted from Bon Appetit

Pumpkin Meringue Cheesecake

Less than a week away from Thanksgiving, and I can barely hold in my excitement. Once it hits November, I get filled with so much joy because there is so much to celebrate!

I started the month by celebrating my birthday with my close friends and family. I went to cocktail making class with my boyfriend which was tons of fun and also a ploy for the best sunrise ever!

After grabbing a $1 slice pizza ( nothing better) , we headed to Korea town where all my friends surprised me. It was truly the best birthday ever!

3A0149A0-32A2-4205-98EC-CF783D0AC980.JPG
6E2C3F2D-E0B4-44DF-8141-F9DD8FAE52A5.jpg

Once my birthday is over, the holiday planning starts!

In my family, we all have our roles, my mom is to prepare her famous corn pudding and apple tart, my aunt handles pretty much everything else and I am in charge of desserts.

Considering that our dinner is the same every year, I love looking at old and recent newspapers and magazines to gather up as much inspiration I can for what dessert I want to make that year!

This year I decided to use a classic Thanksgiving ingredient, pumpkin! There is no secret that I love cheesecake, so this year I decided to do a meringue pumpkin cheesecake, with a gingersnap crust, instead of a regular pumpkin pie! The spice from the crust really gives this dessert a kick, and the meringue on top is the perfect sweetness and lightness that helps balance the whole cake.

Try it – it is a simple and easy delicious dessert to make.

Happy Thanksgiving!


C5388746-96F4-4F51-A6CB-114DA0B2C2AB.JPG
C5E88569-5689-4632-B140-D05518A4EB6A.JPG
PMC. MPM
photo1 2.jpg

Ingredients 

Crust

  • 3/4 cup finely ground graham cracker crumbs, 5 1/2 cookie sheets

  • 3/4 cup finely ground gingersnap crumbs, 6-8 small cookies

  • 1/3 cup granulated sugar

  • 6 tbsp unsalted butter melted 

Filling

  • Two 8oz. pkgs. cream cheese, room temperature

  • 1 cup pumpkin puree

  • 2/3 granulated sugar

  • 2 eggs, room temperature

  • ¼ cup flour

  • ¾ teaspoon cinnamon

  • ½ teaspoon ginger

  • salt

Meringue Topping

  • 3 egg-whites

  • 3/4 cup of granulated sugar

  • Pinch of kosher salt

Recipe

Crust 

  1. Preheat your oven to 350° F. In a food processor, pulse the graham crackers, gingersnap cookies, and sugar until they are fine crumbs. Add the melted butter and pulse to combine.

  2. Press the crumb mixture into a 9-inch springform pan. Bake the crust 10-12 minutes, until golden and fragrant. Once it's done, take it out of the oven and allow to cool. 

Filling

  1. While the crust cools, prepare the filling. 

  2. In a clean, the food processor, pulse the cream cheese until smooth. Add the sugar and pumpkin puree, pulse for 30 seconds. Add the eggs and pulse again. Lastly, add the flour, spices, and a pinch of salt and pulse until the filling is smooth and all combined. 

  3. Pour the filling into the springform pan. Bake for 30-40 minutes or until its set and slightly jiggly. 

  4. Once it is cooked, allow it to cool completely, then refrigerate it for at least 4 hours or overnight. 

Meringue Topping

  1. Before serving, prepare the meringue. 

  2. In an electric mixer, whisk the egg whites, sugar, and salt in the bowl. Set the bowl over a saucepan of simmering water and whisk the mixture until the sugar has dissolved and is hot. 

  3.  Transfer the bowl to the standing mixer and beat at medium-high speed for about 2 minutes, then increase speed to high and beat until mixture is stiff.

  4. Using a spatula mound meringue either on one half or in the middle, and spread it to the edges. Using a spoon, create mountains and swoops of meringue around the surface. Be creative - you can’t go wrong~

  5. Using a culinary torch, hold the torch about a few inches away from the tart, brown the meringue lightly. Alternatively, place the pie in a preheated broiler, watching it carefully, as it will brown very quickly.

Halloween Chocolate Cake

My blog is officially one year old, and I can't believe how fast it's gone by.

I'm so thankful to all of you, my supportive followers! It has been a year of failures and victories, but I have learned so much along the way.

One of my biggest challenges this year was blogging. I love trying out new recipes, and I find myself baking up a storm before even publishing my last recipe, but always end up not writing as much as I would like to! So, one of my goals for this year is to blog more, share a little more about myself, and bring you a little deeper into my kitchen.

Halloween Cake

Another goal is definitely to cook more. I began this blog intending to recreate classic Portuguese dishes, but end up trying out many other recipes other than Portuguese. I went through a period where I felt like I had let myself down for not sticking to my original inspiration for my blog. Still, I'm happy the way it turned out because I ended up trying out recipes otherwise would never have if I stuck with my initial plan.

I have also been practicing baking and decorating cakes lately. Instagram is filled with cake, making videos that I find myself watching on repeat. They make it look so simple, but in reality, it takes a lot of practice to get at that level, so that's why this year perfecting and delivering easy but creative cakes, like this Halloween one, is another one of my goals.

Halloween Chocolate Cake

This Halloween, I chose to bake my favorite chocolate cake, which is frosted with a delicious cream cheese frosting and marshmallows to look like cobwebs. The cake is filled with a raspberry persevere filling, that can easily be substituted for your preferred berry jam I love this combo of flavors, the preserve gives it the right amount of acid to balance out the sweetness of the cake and frosting. Also, the preserves provide a good "bloody" effect that goes well with the Halloween theme!

 
Halloween Chocolate Cake

Ingredients 

Chocolate Cake

  • ½ cup + 2 tablespoons canola oil

  • 1 cup granulated sugar

  • 1 cup brown sugar

  • 3 large eggs

  • 2 teaspoons vanilla extract

  • 2 cups all-purpose flour

  • ¾ cup unsweetened cocoa powder

  • 1 teaspoon baking powder

  • 2 teaspoons baking soda

  • 1 teaspoon salt

  • 1 cup buttermilk

  • 1 cup hot coffee

Cream Cheese Frosting

  • 16 oz. of cream cheese, room temperature 

  • 2 sticks of unsalted butter, room temperature

  • 4 ½ cups of confectioners’ sugar

  • 2 teaspoons of vanilla extract

  • 1 pinch of salt

  • 1 tablespoon of heavy cream

  • 1 tablespoon of cocoa powder

  • black and orange food coloring/gel

  • 1 bag  marshmallows

Raspberry Filling 

  • 1 cup of raspberry preserves

  • ¼ cup of fresh or frozen raspberries

Recipe

Chocolate Cake

  1. Preheat oven to 350º. Grease two 8-inch cake pans and dust with cocoa powder, set aside.

  2. Sift together flour, cocoa powder, baking powder, baking soda, and salt and set aside.

  3. In the bowl of a stand mixer fitted with paddle attachment, beat together the oil and both sugars on medium speed for 2 minutes.Scrape down the sides of the bowl. Add the eggs and vanilla. Beat again. 

  4. With  the mixer on low, carefully add flour mixture in three batches, alternating with the buttermilk, beginning and ending with the flour mixture. Stop the mixer, and scrape down the sides and the bottom of the bowl, making sure there aren’t any unmixed pieces. 

  5. With the mixer on low, stream in the hot water. Mix on medium-low until combined.

  6. Evenly divide the batter among the prepared pans. Bake for 23 to 25 minutes, or until a toothpick inserted into the center of the cakes comes out clean. Let them cool on a wire rack before removing the cakes from their pans.

  7. Once they are cool enough to handle, carefully remove them from the pans and set them on a wire rack while you make the frosting.

Raspberry Filling

  1. Add the raspberry preserves in a small saucepan with the frozen or fresh fruit. Bring it to a boil, or until the fruit has softened, mash the fruit and stir the mixture. Pour it into a separate bowl and allow it to cool completely. 

*  Substitute raspberry for your preferred berry 

Frosting

  1. In a large bowl using a handheld or stand mixer fitted with a whisk or paddle attachment, beat the cream cheese and butter together on medium-high speed until smooth, about 2 minutes. 

  2. Add the confectioners’ sugar, cream, vanilla extract, and a pinch of salt. 

  3. Beat on low speed for 30 seconds, then increase to high speed and beat for 3 minutes until completely combined and creamy. 

*Add more confectioners’ sugar if frosting is too thin, more milk if frosting is too thick, or an extra pinch of salt if frosting is too sweet. 

Assemble

  1. Take 1 cup of frosting and divided into two small bowls, add about 2-3 drops of orange food coloring to one bowl. In another bowl, add a tablespoon of cocoa powder, and 5-7 drops the black food coloring or gel and mix it.

  2. Place one cake layer on your cake stand or serving plate. Evenly pipe the edge of the cake with non-colored cream cheese frosting, add the raspberry preserves to the center. Top with 2nd layer and repeat the step. Top with the third layer, spread remaining non-colored cream cheese frosting on top and around the cake using a bench scraper or offset spatula.

  3.  Refrigerate for 15 minutes. Take your cake out of the refrigerator and apply the colored frosting around the cake using a small offset spatula. 

  4. Melt the marshmallows in the microwave in 30-second intervals, stirring after every interval until the marshmallows are melted and smooth. Allow to cool and then use your hands to stretch/pull the melted marshmallow around the cake to create a spider web.